Tampilkan postingan dengan label Side Dish. Tampilkan semua postingan

Kamis, 14 April 2011

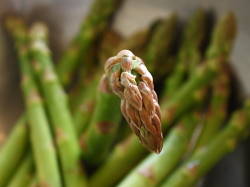
What's Green, Misunderstood, and Full of Hot Air? Asparagus Souffle!

We also would have accepted the answer, "Al Gore." This video recipe demonstrates my basic game plan for any savory, vegetable-based soufflé. Contrary to popular belief, soufflés are not very difficult, as long as you respect the laws of physics.

The cartoon cliché of the housewife crying over a fallen soufflé (because her stupid husband slammed the door) has become an iconic scene of culinary incompetence. Well, I have some good news… these types of soufflés are supposed to fall down.

If you're doing a big cheese soufflé for a dinner party, or the classic Grand Marnier soufflé for dessert, then yes, by all means, bring it to the table straight out of the oven and fully erect. After a minute of oohs and aahs, you serve your highly impressed guests.

But these vegetable soufflés are a simple, seasonal side dish, and all that pomp and circumstance isn't necessary. You don't need to serve this right out of the oven, and you really shouldn't. To really appreciate the taste and texture, the soufflé should cool a bit.

Having said that, if you are doing these for a dinner party then you'll get the best of both worlds; since your guests will invariably be milling about the kitchen while you're cooking, they will see you asparagus soufflés in all their inflated glory anyway.

I hope you give this recipe a try, and also experiment with other vegetables. Broccoli, artichokes, leeks, spinach, or any other edible plant you can puree, should work with the same basic procedure. You can also play around with your cheese options, and as I mentioned in the video, a sharp, white cheddar is my fromage of choice. Enjoy!

Bonus Asparagus Souffle Coverage: This recipe was inspired by an Asparagus Souffle recipe I saw on my friend Elise's blog, the always outstanding, Simply Recipes. Check out her great post here!


Asparagus Souffle Ingredients:
1 bunch asparagus, trimmed, (about 12 ounces by weight)
2 tablespoon butter
2 tablespoon flour
1 teaspoon kosher salt (or 1/2 teaspoon fine table salt)
cayenne to taste
1 cup cold milk
1/2 clove garlic
1/2 cup finely grated cheese
4 eggs, separated

Senin, 04 April 2011

Couscous Primavera – Because I Don't Get Enough Hate Mail from Morocco

Well, it started before I even posted the recipe. Here's a comment from the couscous primavera tease post I did yesterday:

Soukaina said... "plz plz plzzzzzzzzzz !! I am begging you !! stop massacring couscous !! I'm a Moroccan ; been born there , lived there my entire life so I know what I'm talking about !! there's one way and one way only to make couscous , and yours is just not it !! but if you prefer changing some ingredients or adding some stuff to it? that's fine ! do as you wish !! just don't call it couscous."

First of all, I'm only calling this couscous because the package says, "Couscous," and the stuff inside the package was couscous – or at least what we Americans get as couscous. 

Secondly, as with all my ethnically inspired dishes, I don't claim this is in any way authentic. I'm sure it's not, but not having ever had "real" Moroccan couscous I can't argue which version is better, so I'll just assume mine is.

Anyway, the point is, we're not trying to "massacre" anyone's cultural/culinary heritage. This is how we do couscous around these parts, and it's tough to knock a healthy, delicious, and easy side dish that takes about 10 minutes to make.

I'm obviously borrowing the name from the ubiquitous spring dish, Pasta Primavera, which like this recipe hopes to take advantage of fresh, seasonal, green produce. Speaking of which, you are highly encouraged to use whatever vegetables look good at your local (hopefully farmer's) market.

Please note: check the instructions on whatever package of couscous you happen to use. Times vary from 5-10 minutes depending on the brand. Enjoy!


Couscous Ingredients:
2 cups couscous
2 tablespoons olive oil
1 jalapeno, minced
1/2 cup chopped green onions
1/2 tsp cumin
salt and freshly ground black pepper to taste
big pinch of cayenne
2 cups vegetable or chicken stock
1 small bunch asparagus, cut into 1/4-inch pieces
1 cup freshly shucked green peas (or sub frozen like me)
2 tablespoon chopped fresh mint, or other sweet herbs

Rabu, 23 Maret 2011

Pickled Grilled Vegetables – Now, Why Didn't I Think of That?

This pickled grilled vegetables technique was my favorite new discovery on the Kingsford University trip. It's quite a simple, and seemingly obvious trick, yet it never occurred to me. It's times like these when I'm faced with the tragic realization that I'm not as smart and creative as I think I am.

Basically, small pickling cucumbers (which I've always called, "pickles," even if they aren’t pickled yet, just to be confusing), as well as other firm vegetables, are seared briefly over very hot charcoal, before being packed in the sweet and sour pickling liquid.

The grilling imparts a subtle smokiness, as well as a little extra sweetness from the caramelization of the vegetables. I can see these being a regular fixture on the picnic table during the upcoming grilling season. What a perfect compliment to a platter of barbecued pork, or grilled chicken.

These tasted great after just one day, and even better after three. Please don't ask me how long they will last in the fridge, as I believe they should be eaten before that would become any kind of issue. I hope you give it a try, and be sure to tell me all the fabulous ways you flavored your pickling liquid. Enjoy!


Ingredients:
(Adapted from a recipe by Chris Lilly)
6 pickling cucumbers
1 red bell pepper
1 cup sugar
1 cup white vinegar
1 cup water
2 1/2 tablespoons kosher salt, or to taste
big pinch of red chili flakes
12 black peppercorns
2 cloves garlic
1/4 teaspoon dried dill

View the complete recipe

Kamis, 03 Maret 2011

Plantains for Your Membranes – Fried Sweet Plantains for the Winter Blues

According to my sources deep inside the online health community, eating plantains can help fight Seasonal Affective Disorder (S.A.D.), or as it's more commonly called, the "winter blues." 

I don't really have issues with S.A.D., and when I do, I usually fight it with beer, but it is nice to have another option.

It may be the tryptophan, a natural mood enhancer, or the high levels of vitamins C, B6, B12, or maybe it's just all that fiber, but whatever it is, I can report anecdotally that I felt pretty happy after eating these golden-browned beauties.

Above and beyond the purported health benefits, I have an even better reason to try plantains: meatless boredom. I like to mix in the occasional meatless meal, but tend to repeat the same old standbys. Plantains are perfect for breaking up that routine. Besides, I bet that some of your have never even tried them before, and that's just not right.

If you live near any kind of large city, especially one with a Latin-American community, you should find these fairly easily. As I mention in the video, you've probably looked at them many times at the store, but were unsure of exactly what they were, or what you should do with them.

I think when paired with a simple plate of black beans and rice, you're talking about a super simple, very frugal, and quite delicious dinner. I really hope you give them a try soon. Enjoy!


Fried sweet plantains ingredients for about 4 portions:
1/4 cup vegetable oil
2 ripe plantains (peel should be mostly black),
salt to taste
lime wedges, optional

View the complete recipe

Senin, 21 Februari 2011

Apple Jicama Coleslaw – Don't Believe Everything You Read in the Produce Aisle

This crispy, crunchy, and extremely refreshing coleslaw recipe features a very under-utilized vegetable found in almost every large American grocery store's produce section – I'm talking about jicama.

In fact, there's a good chance you'
ve never had it, which is a shame. The flavor is very mild, and subtly sweet. It's just perfect for raw salads like this coleslaw, and blends wonderfully with the tart apple and crunchy cabbage.One problem with jicama is how it's marketed. As you'll see in the video, the label described it as, "a Mexican potato," which is just a terrible comparison. If you want to make something sound unappetizing to an American, have them think they are going to be eating something that's like a raw potato. Yum.

Jicama does have a similar texture to a raw potato, but that's where that comparison ends. It is a little starchy, but pleasantly so, and each bite produces a mini explosion of juicy goodness. So, don't be afraid! I hope you buy some jicama on your next trip to the market, and give this easy side dish recipe a try soon. Enjoy!


Apple Jicama Coleslaw Ingredients:
1/2 small green cabbage, sliced into 1/4-inch strips
1/2 jicama, sliced into 1/4-inch strips on a vegetable slicer
1 large Fuji apple, sliced into 1/4-inch strips on a vegetable slicer
For the dressing:
1/4 cup pineapple juice
1/2 cup mayonnaise
1 tsp sugar
hot sauce to taste
salt to taste
1/3 cup crushed corn nuts


View the complete recipe

Kamis, 17 Februari 2011

Artichoke and Spinach Stuffed Shells - A Lesson in Leftovers

I love cooking with leftovers, and this artichoke and spinach stuffed shells recipe is a perfect example of why. There's something very satisfying about turning a dish of tired leftovers into a vibrant new creation. It's also great exercise for your cooking muscles, which should never be confused with your following-a-recipe muscles.

When you follow a recipe, you're tying to manipulate food into something fabulous that fits some beautifully idyllic description, or looks like some photoshop'd picture in a cookbook. When you're cooking with leftovers, you don't have as lofty of a goal. In fact, your usually just trying to keep something from going straight into the bin.

Much like a sports team that has nothing to lose, and plays great because of their free and easy attitude, the same thing often happens when cooking with leftovers. In fact, if I weren't so jetlagged, I'd come up with some brilliant metaphor for living life with this same approach.

Due to dangerously high quantities of food at our Super Bowl party (by the way, how 'bout dem bones!), I found myself with a significant amount of leftover spinach artichoke dip. I've always enjoyed spinach and ricotta stuffed pasta shells, so I thought I'd see if I could turn this fairly unattractive dish of food into something slightly less unattractive.

As you'll see from the video, I think I succeeded. The would have been too long had I included the making of the béchamel sauce, but we've done that one many times, and you can see that recipe video here. I just made a standard batch of white sauce, and tossed in a handful of grated Gruyere.

Anyway, I hope this video inspires you to take a look around the fridge, and fearlessly, and without any grand expectations, make something into something else. Enjoy!

Technical Note: Do not adjust your monitors! This was filmed at my mom's home on a dark winter's day, so the lighting is not very good. Although, it is kind of fitting for the subject.


Artichoke and Spinach Stuffed Shells Ingredients:
(recommended as a side dish)
3 cups leftover spinach artichoke dip
1 generous cup ricotta cheese
1 egg
salt and fresh ground black pepper to taste
red pepper flakes to taste
juice from one lemon
1 box jumbo shells
1 batch béchamel sauce with 1 cup of grated cheese added to it at the end
1/2 cup grated Parmigiano-Reggiano cheese

Kamis, 23 Desember 2010

Brussels Sprouts Roasted with Cipollini Onions – Warning: Takes Longer than 60 Seconds

As many of you know, I also do recipe videos for About.com, but what you don't know, and would probably never guess, is that out of all the recipes I've produced for them, the most popular is a Brussels sprouts dish!

It's called 60-Second Brussels Sprouts, and you can see the original post here. As the name suggests, the recipe calls for a super-fast sear-and-serve approach. Here, we're at the other end of the spectrum. These actually get cooked twice, and for a much longer time.

The secret here is a quick blanching in boiling salted water, and then 15 or 20 minutes in a really hot oven. The searing heat and natural goodness of the vegetables do most of the work, so nothing more than a little brown butter and seasoning are needed.

This would make a very nice side dish to your holiday feast, and I can't think of a main course, especially one made from some type of succulent animal, that this wouldn't pair wonderfully with. If you can't find the Cipollini onions, just use pearl onions, or you can just leave them out altogether.

By the way, the Brussels sprouts only need a couple minutes blanching to prepare them for the oven, but the Cipollini onions should be cooked almost to the point of being tender before being roasted. You want that nice mellow, sweet onion flavor, not something sharp and jarring to the palette.

I hope if you have more that 60 seconds, you'll give these a try. Enjoy!


Ingredients:
1 pound Brussels sprouts
1/2 pound Cipollini or pearl onions
2 tablespoons butter
salt and fresh ground black pepper to taste

Senin, 22 November 2010

Once-a-Year Scalloped Oysters

Some recipes you only make once a year because they're just so-so. Other recipes, like this dish of scalloped oysters, you only make once a year because they're too good.

Scalloped oysters are so rich and decadent, it's a recipe you save for those very special occasions. Happily, we have a bunch of those coming up. This great holiday treat features the briny bivalves baked in a creamy, buttery casserole.

One word of warning: if you don't love cooked oysters, you should probably not make this. By the way, scalloped oysters is one of those recipes that are actually better warm, than piping hot, which is another reason it makes such a great choice for large family gatherings. I hope you give this a try. Enjoy!


Scalloped Oysters Ingredients:
Makes 12 Side Dish Servings
3 cups saltine crackers, coarsely crushed
1/8 teaspoon cayenne pepper
3/4 cup melted unsalted butter
1 quart shucked oysters with liquor
1 cup heavy cream
2 tablespoons chopped Italian Parsley
salt and fresh ground black pepper to taste
lemon wedges, optional


View the complete recipe

Minggu, 21 November 2010

What's in Your Sexy Thanksgiving Side Dish Drawer?

Thanksgiving, the holiest of American foodie holidays, is almost here. I'll assume you already have a great turkey and gravy recipe, so today we are focusing on the side dishes (if you don't, please check out our critically acclaimed, two-part video series, How to Make Turkey and Gravy).

Any Thanksgiving dinner expert will tell you, it's not a great turkey that makes the meal, it's what you pair it with. What good is a beautiful bird dressed with a bunch of so-so sides?

I was just about to make an inappropriate "gorgeous dress, with shabby lingerie" analogy, but I think you get the point.

So, without further adieu (that's French, like
the good lingerie), here are some of my favorite side dish recipe videos, all of which would make a lovely addition to your holiday spread. Enjoy!

Creamed Spinach


Creamy Corn Custard


Pecan and Apricot Sourdough Bread Stuffing


Green Bean and Blue Cheese Gratin


Lime and Chipotle Glazed Sweet Potatoes


Celery Root and Potato Puree


Cold Broccoli Salad


Cheesy Broccoli Gratin


Butter Roasted Cauliflower


Rabu, 15 September 2010

Savory Gorgonzola Bread Pudding – A Cure for the Steak Side Dish Blues

I'm calling this savory Gorgonzola bread pudding because that's what they called it at the restaurant I stole the idea from. Hey, that's the least I can do.

By the way, that restaurant would be 2223 Market, San Francisco, and when I saw it sitting there next to my grilled rib eye, I knew it was only a matter of time before it made its way on to the blog.

If you’re afraid to call it a savory "bread pudding" because it sounds a little too desserty, then at least do me a favor and call it a dressing, and not a stuffing. You know I'm no fundamentalist, but I've decided that for something to be called a stuffing, it actually needs to be stuffed into something.

No matter the name, this should make for a welcome respite from the usual side dish rotation. Maybe it's because the meat is so expensive, but I find cooks get very conservative when it comes to choosing accompaniments for a steak dinner. No one ever got in trouble serving a baked potato, but sometimes you have to take a chance, and this would be a bold, and I predict, well-received choice.

As far as the recipe goes, it's quite straightforward, and I pretty much cover all the variables in the video. You may wonder where the garlic is, which is a damn good question. Since I was going to serve the steaks with a garlicky sauce, I decided to show a little restraint.

Speaking of restraint, be careful with the Gorgonzola. The only real way to mess this recipe up would be to overdo it on the cheese. Gorgonzola is about as subtle as a frying pan to the forehead. Also, don't pack your ramekins too firmly. The only thing I like better than nooks, are crannies, and you want lots of both here to provide the surface area for a nice crunchy top. Enjoy!


Savory Gorgonzola Bread Pudding Ingredients:
(for four 5-6 oz ramekins)
2 tablespoons butter, divided
1/2 onion, diced
pinch of salt
freshly ground black pepper to taste
4 cups cubed bread
1 cup chicken stock
1 teaspoon fresh thyme leaves
1/4 cup cream
1 oz (about 2 tablespoons) Gorgonzola, or other blue cheese


View the complete recipe

Sabtu, 03 Juli 2010

Crusty Roasted Yellow Potatoes - Now with Extra Steps!

So, you know how I'm always saving you time and money by designing these video recipes with a minimum number of steps?

This time we're going the o
ther way. I'm taking a perfectly good roasted potato recipe and adding another procedure.

The secret to these deliciously crusty potatoes is the pre-oven boiling in a salted and seasoned liquid. The potatoes not only absorb flavor and salt, but more importantly
the surface of the potato cooks, which is what forms the great crunchy texture in the oven.

This is sort of the same idea behind the twice-fried French fries we featured in a video last year. By the way, it's very important to let the potatoes really dry well before coating with the oil. This will ensure a great crusty skin.

You can use this same technique, and flavor the cooking liquid any number of ways. If you like this recipe, you'll have lots of experimenting to do.

I hope you all have a fun Fourth of July planned! I'm almost done with the cured lemon quail recipe, so stay tuned for that soon. Have a safe and fabulous rest of the weekend, and as always, enjoy!


Ingredients:
2 pounds new yellow potatoes
3 sprigs rosemary
3 cloves garlic, whole, peeled, bruised
2 bay leaves
2 tablespoon salt
2 tablespoon olive oil
pinch of cayenne

Senin, 21 Juni 2010

This Pan-Fried Butter Beans Recipe Only Sounds Unhealthy!

I can see where a recipe title with the words "fried" and "butter" appearing one after the other may scare a few people off, but there's no reason to be alarmed. This pan-fried butter beans recipe is delicious, super-easy, and yes, good for you.

These big, creamy legumes are just perfect for pan-frying. The thick skins get all crackly, and crusty, and will soak up whatever you decide to flavor them with. Here they get a very traditional treatment of salt, pepper, garlic, and herbs. A little vinegar at the end to balance things out, and you have a beautiful summer side dish.

I'm posting this while waiting for my flight back from the Food & Wine Classic in Aspen, so we'll keep things nice and brief. Actually, now that I think about it, there's really not much more to say. So, I'll just finish with a little end-of-recipe advice.

This version is "dry," which is how I like these butter beans served, but if you want something a little moister, towards the end you can add freshly diced tomato, some broth, or even more oil olive and vinegar. Don't worry, you can't break this recipe…it's beans! Enjoy.


Ingredients for 2-4 servings:
1 can butter beans
3 tablespoons olive oil

garlic cloves as needed
salt and fresh ground black pepper to taste
red pepper flakes to taste
couple sprigs of fresh herbs
1 tablespoon white wine or sherry vinegar

Senin, 10 Mei 2010

Can I Get the Onion Rings, Instead of the Fries?

Onion rings have an odd place in American cuisine. Everyone seems to love them, and they're on the menu at just about every burger joint in the country, yet their popularity as a side dish to meat on buns doesn't even come close to the venerable French fry.

The reason is as obvious as it is annoying – they cost extra. Fries always come with the burger, but if you want those crispy, golden brown rings of pleasure, it's going to be $2.00 more.

Sure you crave the crunchy goodness, but the thought of paying extra to upgrade a side dish at Big Bad Billy's Burgers and Beers seems downright un-American.


So, as much as you may want them, and as much as you may fantasize about what a nice treat they'd be while standing in line, when you come belly to cash register, you just can't pull the trigger.

Well, I have good news – this onion rings recipe is so easy, and so amazingly crispy, you can now make up for all those years of deep-fried denial by making these at home.

If fact, these are so good, you may want to consider charging your friends and family a little bit extra for the upgrade. Enjoy!


Ingredients:
1/2 cup all-purpose flour
1/4 cup cornstarch
2 tablespoons instant mashed potatoes
big pinch of cayenne
1 cup cold club soda
2-3 cups Panko (Japanese-style breadcrumbs), or as needed
fine salt to taste
vegetable oil for frying
2-3 yellow onions, cut into 1/4-inch rings
*Note: the amounts in the video were for a smaller batch. The amounts above will make a nice large batch, enough for about 8 servings.

Kamis, 25 Februari 2010

Sufferin' Succotash? More Like Succulent and Super-Interesting Succotash!

When most of you hear the word, "succotash," you probably don't think of a delicious vegetable side dish, you probably think of Warner Brother's Sylvester the cat's catchphrase, "Sufferin' succotash!" But succotash really is a great, and very underrated recipe.

As I say in the video, this may be America's oldest vegetable recipe, coming from the Narragansett Indian word, "msíckquatash," which according to the Merriam-Webster Dictionary means "boiled corn kernels."

You can see from the photo, this is much more than that, combining an array of vegetables including corn, beans, and squash. These three ingredients were such an important source of nutr
ition for the Native American's they were referred to as "The Three Sisters."

The way they cultivated these three plants together was sheer genius. The corn's stalks were perfect for the climbing vines of the bean plants. In turn, the bean's roots captured nitrogen from the air, enriching the soil, producing larger crops. But it was the third sister that really made the system so brilliant.

Squash sends out long, winding vines with large leaves that stay close to the ground. This acts as an edible ground cover, which not only kept the weeds away, but also provided shade for the corn's shallow roots. It also kept the ground moist, which helped the beans grow, which helped the corn grow higher, which made for longer bean vines/yields, etc., and so on. Who knew succotash could be so fascinating?!

Anyway, I hope you give this easy and nutritious vegetable side dish recipe a try. Enjoy!


Ingredients:
1 tablespoon olive oil
1/2 tablespoons butter
1/2 yellow onion, diced
3 garlic cloves, minced
1 jalapeno or other small hot chili pepper, sliced
1/2 red bell pepper, diced
1/2 cup diced tomatoes
4 oz green beans, cut in 1/2-inch pieces
1 1/2 cups fresh or frozen corn
1 cup frozen baby lima beans, thawed
2 green zucchini, cubed
1/2 tsp ground cumin
pinch of cayenne
salt and freshly ground black pepper to taste

Jumat, 05 Februari 2010

Creamed Spinach – King of the Steakhouse Side Dishes


While in Vegas, I had a marvelous steak lunch at the Strip House, located in the Planet Hollywood Resort & Ca
sino. Along with the beautifully aged steaks, we enjoyed two stellar sides.

One was a potato dish called Potatoes Romanoff, which Executive Chef John Schenk says he learned from his mother back in Buffalo, NY. I've posted the written recipe for Potatoes Romanoff on my American Foods site, in case you want to give it a go.

The other was my favorite non-potato steakhouse side dish, creamed spinach. Since creamed spinach is one of the side dishes I have to do for the cookbook, and since I haven’t had a new video up in a while, I decided to film this recipe while its creamy deliciousness was still fresh in my mind.

There is only one real secret to great creamed spinach…you have to really squeeze out all the water after you wilt it. If you do, the buttery béchamel sauce coats the spinach to form a thick, satisfying pile of greens that you can almost stand a fork up in. If you don’t, you will be amazed at how the water from the spinach turns your thick, tasty sauce into a pool of pale green disappointment.

Creamed spinach is an easy recipe, but it used to require quite a commitment to make, since washing and picking spinach is tedious and really no fun at all. Nowadays, big bags of pre-washed, baby spinach are common at the supermarket, which makes this recipe a snap. Enjoy!


Ingredients:
1 stick butter
24 ounces baby spinach
1/2 onion, finely diced
1 whole clove
4 cloves garlic, very finely minced
1/3 cup flour
1 1/2 cups milk
salt and pepper, to taste
large pinch of freshly ground nutmeg

Jumat, 20 November 2009

Red Curry Butternut Squash – When it Comes to Side Dishes, the Food Gods Hate a Coward

As you decide on what to include in your fabulous array of vegetable side dishes for the upcoming holiday feasts, keep one thing in mind. No guts, no glory. For some reason, normally adventurous cooks when faced with a house full of hungry relatives, play scared.

It's probably driven by the desire to want everyone to enjoy everything (you know that's impossible, right?). Serving something too exotic just doesn't seem prudent. I take a different approach. Since these holiday meals are one of the rare times we get to serve multiple side dishes, I think it's the perfect occasion for springing a surprise or two.


This lovely red curry butternut squash certainly fits the bill. Sweet, spicy, and mysterious – this turkey-friendly side dish won't be everyone's cup of tea, but for those at the table that let it work its magic, it promises to be one of their favorite parts of the meal.

Like I said, there are plenty of other side dishes on hand, so even if the worse case scenario happens and everyone from little Billy to Grandma Jean agrees this is the worst squash dish ever, so what? There are seven more sides to pick up the slack. Besides, after the third bottle of Beaujolais Nouveau who's really going to care?

If you've never worked with red curry before, be careful. It's really spicy, and you can always add more as it cooks. To be safe, you can even cut my measurements in half for the spices and then adjust. I hope you give this interesting butternut squash side dish a try. Enjoy!


Ingredients:
3-4 pounds butternut squash, peeled cut in 1-inch cubes
1 bunch green onions
1 tsp cumin
1 tbsp red curry powder (I used McCormick)
1 tsp red curry paste (I used Taste of Thai)
2 tbsps tomato paste
1 can coconut milk
1 rounded tbsp brown sugar
3 tbsp fish sauce (or sub to-taste with soy sauce or salt)
1 tbsp vegetable oil
3 cloves garlic
1/4 cup torn fresh basil leaves
*adjust for salt and heat before serving

Jumat, 18 September 2009

Cool Beans! Fresh Corn and Shelling Bean Ragout a la Ramblas

At a recent dinner at Ramblas in San Francisco, Michele and I enjoyed an incredibly simple, yet deeply flavorful shelling bean ragout. Ramblas is our favorite Spanish restaurant in the City, and the big, meaty beans were stewed with corn, citrus, and currants.

In fact, I was so impressed with this dish I swore to myself the next time I saw fresh shelling beans, I would attempt something similar. A week later I was shopping in Berkeley and saw a beautiful pile of cranberry beans (another common name for shelling beans).

I was so happy, and my mouth watered thinking back to that great crock of beans. I'm sure as I stuffed them into the bag, I had one of those deranged smiles that had on-lookers wondering, "What the hell is wrong with that guy."

As you watch this video, I can understand if the combination of ingredients seems a little strange, but trust me, this is a fantastic vegetable dish. It's my new favorite side dish, which is funny since I can't seem to wait for the main course to eat it.

At the end of the video, I garnish the dish with a spoon of something called gremolata. I've already filmed this for another recipe, which isn't live yet, so you will get to see that made, but for now here's all you need to know. Gremolata is simply fresh parsley minced with some raw garlic and lemon zest, moistened with a little olive oil.

This sharp, raw green sauce, along with a little more freshly zested lemon takes a great bean dish and turns it into something spectacular. Enjoy!


Ingredients (these amounts are complete guesses):
2 tbsp olive oil
2 cloves sliced garlic
1 cup shelling beans
1 cup fresh corn
2 tbsp dried currants
chicken broth as needed (about 1 1/2 cups total, maybe, possibly)
1/4 cup diced fresh ripe tomato
2 tbsp chopped fresh oregano
salt and fresh ground black pepper to taste
1 tbsp fresh lemon zest
To garnish:
gremolata (see description in post)
lemon zest

Kamis, 10 September 2009

Susie Q's Santa Maria-Style Salsa (You can call it the ketchup of Santa Maria-style BBQ, but please don't)

We got to see and sample so many great recipes on our recent trip down to California's Santa Maria Valley, but my favorite may have been this Santa Maria-style salsa recipe.

This
recipe was demonstrated for me by Susan Righetti, (also known as Susie Q on her website, where she sells local artisan food products). She is an authority on the local cuisine of California's central coast, and hosted us for a fantastic day of cooking and eating.

In addition to this great salsa, she also made a batch of Santa Maria-style pinquito beans, and her husband Paul showed me the real way to do a barbecued tri-tip (on a custom-made barbecue pit in the middle of the house!) I will be posting both those videos as soon as I can.

Susan joked about the Santa Maria-style salsa being, "the ketchup of Santa Maria-style BBQ," since it's always served along side the area's famous barbecued beef.

We had some version of this sauce at just about every meal (including breakfast), and it really did make the smoky meat even more delicious. Some places make a smooth version that's used as a sauce, others make a very chunky style, as seen here, which is eaten more like a side dish salad.

She had a big beautiful bowl of ripe tomatoes which she could have used in this video, but she said that canned tomatoes also work, and since most of you won't have regular access to big beautiful bowls of ripe tomatoes, I had her use the canned ones in the demo.

Susan has a website called Susie Q's Brand where she sells a large variety of local Santa Maria food products, including the magical red oak wood chips. If you are interested in learning more, or want to check out her stuff, here is the link. Enjoy!


Ingredients:
(this is for a half batch of the large bowl you see in the video - about 6 cups)
1 can 28-oz whole tomatoes
1 can 7-oz diced green chilies
1/2 red onion, diced
1/2 bunch green onions, thinly sliced
1/4 cup olive oil
1/4 cup red wine vinegar
2 tbsp balsamic vinegar
2 cloves garlic, finely minced (may substitute garlic powder to taste)
2 tbsp chopped parsley (may also substitute or add fresh cilantro)
salt and fresh ground black pepper to taste

*Note: Susie used a shake of her Santa Maria Seasoning, which I have broken down into salt, pepper, etc., here. You can see what's in her blend on the Susie Q's website.

Senin, 17 Agustus 2009

Mr. Potato Head's Truffled Potato Gratin

I am Mr. Potato head. No, not because of my rather large cranium (hey, it has to be big to fit my huge brain), but because my thoughts are so often centered on potatoes.

Some people daydream about winning the lottery, or being hired as Scarlett Johansson's personal masseuse; I sit and dream about new potato side dishes like this one.

This amazing truffled potato gratin recipe was the star of my recent dry-aged steaks dinner, and was probably the best potato side dish I've had all year.

I love potatoes so much that when I'm looking at a menu in a restaurant, I will actually order my entrée based on what the potato is. I don't care what the main course is, if I see this potato gratin as the accompaniment, that's what I'm getting.

If you've never had truffles before, and are wondering what all the fuss is about, then this is the recipe to try for experiencing the real magic of these fabulous fungi. The great thing about this recipe is you don't need a fortune worth of fresh truffles to make it, thanks to an Italian cheese called sottocenere.

Sottocenere is a semi-soft, fairly mild cheese that's studded with fragrant truffles. When baked into a potato gratin like we've done here, you get the full punch of truffle flavor and aroma, but at a fraction of the cost.

Before you start whining about not being able to find it, check out your nearest big city's best cheese shop -- they can get it. If a store imports Italian cheeses they will have access to this miracle of mycological cheese making.

Speaking of mushrooms, I used a mix of brown and lobster mushrooms, which worked very nicely, but this recipe will be spectacular with any mushroom.

If you can find some wild mushrooms like morel, chanterelle, porcini, or lobster, use them -- but if you can't, use regular supermarket mushrooms and you will still be rewarded with a very memorable potato side dish. Enjoy!


Ingredients:
2 tbsp butter, divided
1 tbsp olive oil
5 cups sliced mushrooms
1 clove garlic, minced
1 tbsp fresh thyme leaves
5 medium russet potatoes, sliced thin
salt and fresh ground black pepper to taste
6 oz sottocenere cheese, grated
2 cups cream
1 cup chicken broth